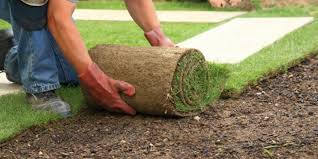
While we do not provide installation services, here are some instructions and information to ensure your sod is installed correctly.
Step 1: Unroll Turf
 Start laying turf along a straight edge, such as a patio, a fence, flower bed or driveway. Work with whole pieces, laying them one at a time, end to end. Avoid walking on the sod as you lay it, and rake out any footprints you make in soil as you go. Work to smooth out any wrinkles in the sod. Pat sod carefully into place, so there aren’t any air pockets between soil and sod.
Step 2: Lay Turf in Rows
Cut the next piece of sod in half and lay it against the first, staggering the joints like in a course of bricks. A cheap carpet knife works well to slice through sod.
Step 3: Create Tight Seams
Align edges of sod together tightly but without creating overlap. Push your thumbs along the edges to fit them snugly against each another and to make sure there aren’t any air pockets or bare soil showing along the seam.
Step 4: Place Small Pieces in Middle
As you come up with small pieces of turf, tuck them into the center of the lawn area, so that all edges are touching other sod pieces. If you use small pieces to fill in along the edges of a lawn, they’re more prone to drying out and more likely to shrink and even die.
Step 5: Cut Curves
To get curving sections just right, lay out the curve with a hose, and use a lawn edger to slice neatly along the curve. Grab your carpet knife to slice openings in sod around irrigation heads, trees or other obstacles.
Step 6: Fill in Seams
Brush commercial topsoil or potting soil across all seams using a strong push broom. Take care not to push up loose turf edges.
Step 7: Roll Sod
Use a lawn roller to push sod firmly against soil beneath. A tight connection between sod and soil is the secret to roots knitting quickly into soil. Limit traffic on the sod for the first three weeks while it’s establishing. This includes children and pets.
Rolawn Limited - Published on Jan 14, 2011